Hive Management Checklist: Beginner Hive Care
Hive Management Checklist: Step-by-Step Hive Care
TL;DR: Effective hive management shifts a beekeeper’s role from passive observer to active steward, ensuring the colony remains healthy, productive, and well-resourced. This chapter outlines a comprehensive inspection checklist designed to help beginners monitor their bees without disrupting the hive's delicate ecosystem.
- Inspection Schedule: Inspect the hive every 7–10 days during active spring and summer months on warm, calm days, but avoid opening the hive in winter.
- The "Queen Check": Verify the queen's presence by looking for single eggs in cells and ensuring the brood pattern is solid and compact rather than spotty.
- Resource Management: Monitor honey and pollen stores to prevent starvation and add new boxes when the hive is 70–80% full of bees and resources.
- Health & Safety: Scan frames for warning signs like swarm cells, Varroa mites, or aggressive behavior, and always use a smoker to keep bees calm.
- Record Keeping: Maintain a log of every visit—noting population, temperament, and action items—to track long-term hive health.
By now, you have successfully installed your bees and established a feeding routine to help them draw out comb. Now, the real journey begins! Effective hive management is key to nurturing a thriving, productive colony.
For a beginner, opening a hive full of thousands of stinging insects can feel daunting! However, regular inspections are the only way to fully understand the health of the hive. Inspections allow you to check up on your queen, track the strength of the population, and take note of the resources available to your bees. Without looking inside the hive, you are essentially flying blind.
In this chapter, we’ll give you the tools and confidence to perform routine hive care like a pro. Continue reading to learn how to handle hive inspections step-by-step.
Why Regular Hive Inspections Matter
Some new beekeepers think of hive inspections as “checking for honey.” We recommend starting with a different mindset. A hive inspection is actually more like a proactive health checkup. After all, your bees rely on you for stewardship, and you owe them the care and attention they need to thrive.
Conducting a regular hive inspection allows you to answer three critical questions:
- Is the Queen Alright? Is she alive, and is she laying a solid pattern of worker brood?
- Are There Sufficient Resources? Do your bees have enough honey and pollen, or do they need feeding?
- Is the Colony Healthy? Is the hive free of pests like Varroa mites, and do they have enough space to grow without swarming?
If you neglect these checks, you may miss the warning signs of a failing queen or a starvation event. These things can happen whether or not you inspect diligently, but, ideally, you want to catch these problems before it’s too late to intervene.
How Often to Inspect a Bee Hive

One of the hardest lessons new beekeepers have to learn is how to find balance when it comes to inspections. If you have a laissez-faire attitude and leave the bees to their own devices, you might miss serious issues. However, if you’re an anxious beekeeper and inspect too frequently, you risk disturbing your busy colony.
Every time you inspect the hive, it has an impact on the internal temperature. Even subtle shifts can change your bees’ productivity levels. Early on, bees need to work hard to draw comb, so too many inspections can be detrimental.
As a general rule, we recommend inspecting the hive once every seven to ten days, especially during the active spring and summer seasons. Rapid springtime growth means the colony can run out of space quickly. Weekly checks help you catch swarm cells before the bees leave.
As nectar flow stabilizes, you can instead begin inspecting the hive every ten to fourteen days. That’s a great hive inspection cadence for the sultry summer months.
However, unless you live in a uniquely warm climate, do not inspect your hive during the winter. Introducing cold air can actually kill the brood. Instead, monitor your bees from the outside to keep them warm and healthy.
The Perfect Conditions for Hive Care
Aim to choose an inspection day that is sunny and calm, with temperatures of at least 60°F (but, ideally, 70°F+). If there is wind, skip the inspection. Wind can make bees defensive, which can make for an unpleasant inspection for all!
What about timing? We recommend planning to inspect the hive between 10:00 AM and 2:00 PM. At that time, the majority of the older foraging bees will be out gathering nectar. That means you won’t have to deal with the bees most likely to sting.
The Ultimate Beekeeping Hive Inspection Checklist
A lot of new beekeepers know inspections are important, but don’t know what to look for once the hive is open. To ensure you don't miss anything, we’ve compiled a beekeeping hive inspection checklist. Use this as your guide until inspections become second-nature.
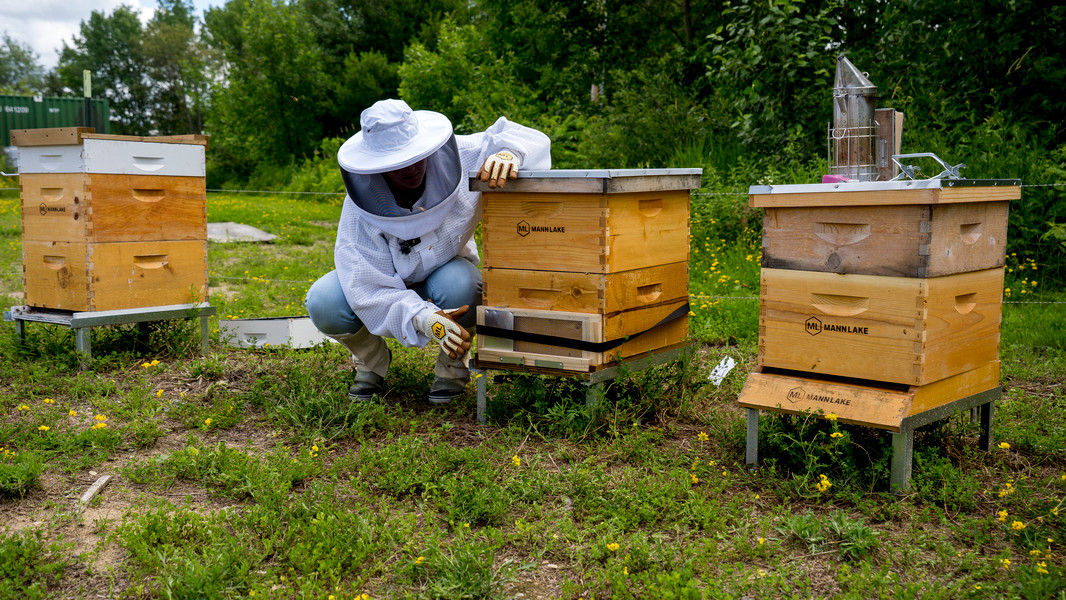
Step 1: Preparation and Exterior Check
There are a few things you should do before you even touch your hive tool. First, put on your veil and protective gear for safety. Then, light the smoker and confirm that you have cool, white smoke. Safety matters, especially for new beekeepers.
Next, you can conduct an exterior check.
Look at the landing board. Are bees bringing in pollen? If so, you’ll notice bright orange or yellow pellets on their legs. That’s a great sign of active brood rearing, and means things are going well!
Step 2: Opening the Hive
Before opening the hive, give a gentle puff of smoke at the entrance to mask alarm pheromones. Then, remove the telescoping cover and inner cover, puffing a little smoke across the top bars. Be sure to move slowly to avoid triggering defensive behaviors in your bees.
Step 3: Reading the Frames
Remove the outermost frame first. This frame usually contains only honey or empty comb and is less likely to hold the queen. Set it aside on a frame perch or lean it against the hive stand to create working space. Proceed to lift and inspect the remaining frames one by one.
Aim to check the queen, check for resources, and assess space.
First, look for the queen, but do not obsess over finding her. If you see eggs, you know she was there within the last 3 days. Eggs will look like tiny grains of rice standing up at the bottom of the cell.
Also, take a look at the brood pattern. A healthy pattern is solid and compact, like a steak. A "shotgun" pattern (spotty with many empty cells) may indicate a failing queen or disease.
Then, assess the resources. You should see honey and nectar in the upper corners of the frames. Pollen should be stored next to the brood nest to feed the larvae.
Finally, conduct a space check. Is the box between 70% and 80% full of bees and resources? If so, it is time to add another brood box or a honey super.
Step 4: Identifying Potential Issues
First, look for large, peanut-shaped cells hanging from the bottom of the frames. These are known as swarm cells.
If you see swarm cells, you’re going to need to split the colony quickly to prevent swarming. We’ll discuss this further in the next chapter.
Next, keep an eye out for Small Hive Beetles scurrying into corners or Varroa mites on the backs of bees. If caught early, you can intervene to keep the hive healthy. You’ll learn more about common bee illnesses in Chapter 9.
Finally, assess the temperament of your bees. Are they calm, or do they seem excessively aggressive? Changes in temperament can signal queenlessness or predator stress. It might mean you have a skunk lurking nearby!
Step 5: Closing Up
When you’re done, push the frames gently back together, ensuring they are shoulder-to-shoulder to maintain proper spacing. Start by replacing the first frame that you removed.
Don’t forget to replace the inner cover and telescoping lid.
It’s also a good idea to weigh the hive to get a baseline. That way, you’ll develop a sense of how heavy regular food stores feel.
Post-Inspection Record Keeping
Effective hive management relies on data. Keep a simple logbook or use a smartphone app so details don’t blur into one another.
After each inspection, aim to record:
- Date and weather conditions.
- Temperament of the bees.
- Estimated population (low/medium/high).
- Queen status (saw her, saw eggs, or neither).
- Action items for next time (e.g., "Bring more syrup," "Check for mites").
Always review the previous record before your next inspection.
The Final Buzz on Beehive Maintenance
By sticking to a consistent schedule and using a beekeeping hive inspection checklist, you’ll ensure that your bees have the support they need to build a strong, sustainable colony. However, even the best hive management routine can encounter hurdles. One of the biggest challenges a beekeeper faces is when a strong colony decides to pack up and leave.
Regular hive care is the best way to avoid swarms. Here’s what every beginner should know about preventing bee swarms.