How to Install Nucleus Colony Bees
Setting up your honey bees in their new hive can be a swift yet rewarding endeavor. This process marks the exciting beginning of your journey into beekeeping.
To ensure that both you and your bees are ready for this significant occasion, follow the provided instructions below. With careful preparation and execution, you can create the optimal conditions for your bees to thrive.
Pre-Installation Preparation
Preparation is key when welcoming your bees! Double-check that all your equipment is put together, painted, and arranged in the bee yard prior to your bees' arrival. It's critical to have your essential kit ready, including clean and ready protective gear and a conveniently placed hive tool. Also, don’t forget to prepare bee feed and a pollen substitute!
| Quick Guide: Before beginning, lay your tools out in the order you'll use them. This helps streamline the process and minimizes disruption to your bees. |
Pre-Installation Bee Care
Swiftly installing a nuc is crucial. If you need to transport your bees, secure them thoroughly and avoid wrapping them in a blanket or winter wrap to prevent overheating. If you can't install your bees immediately, maintain them in a quiet, dark place with an ideal temperature of 50°F – 70°F. Never chill or cause your bees to overheat.
To feed your bees, generously spray or brush Pro-Sweet, a 1:1 mixture of water/sugar syrup or water/high fructose corn syrup, onto the screen sides about 3-4 times a day. Follow the instructions below for a step-by-step installation, or print our installation guide.
Step 1: Begin by refilling your smoker with fuel and igniting it. This is a crucial step because the smoke will play a significant role in calming your bees before they are transported to their new hive.
Step 2: Position the nuc box closely next to the deep hive body, which is set to receive the bees. The deep hive body should be placed on the full or screened bottom board. If weather conditions do not allow for installation, leave them until you can install them with the entrance open.
Step 3: To prepare the deep hive body for the nuc, carefully remove six individual frames from the center section and place them aside. Always remove an additional frame than the size of the nuc box you are placing to allow buffer space for the bees to maneuver safely.
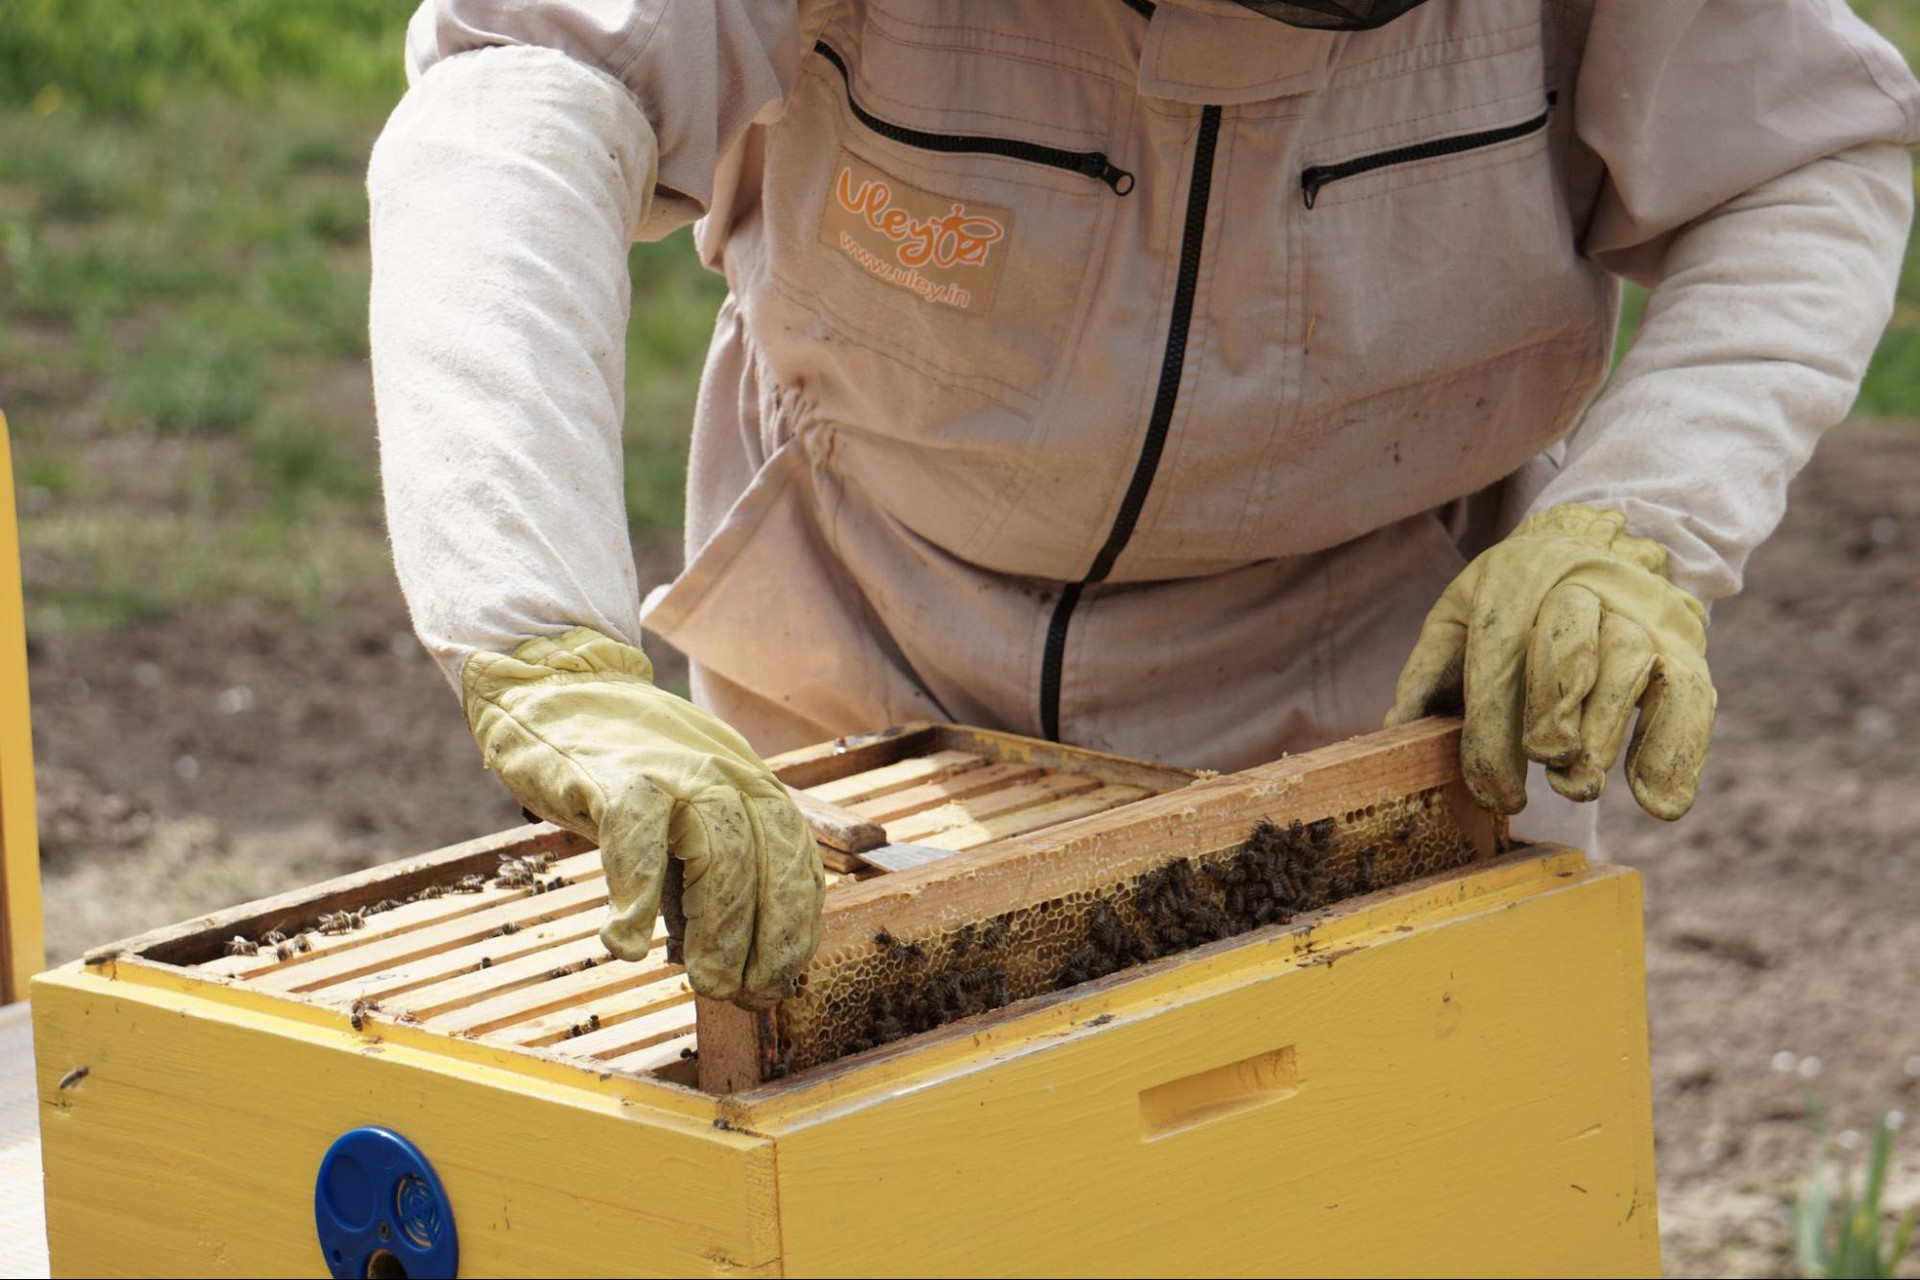
Step 4: Remove the lid from the nuc box. At times, you may witness a propolis seal formed between the body and the lid of the nuc box resulting from bees' activities. In such cases, use the hive tool to break this seal gently.
Step 5: Proceed to smoke your bees lightly by directing the smoke across the top of the nuc frames. This action creates a calm environment, which is essential for the transfer process.
Step 6: The next steps should be taken with slow, purposeful movements, taking extreme care to reduce the risk of harming the queen. Starting with one of the outer frames of the nuc box, gently lift up and out. You may need to use a hive tool to gently break the propolis seal between nuc’s frames. Keep the frame over the box as much as possible and carefully move it over to the top of the hive body. Insert the frame next to one of the empty frames in the hive.
Step 7: Transfer the remaining frames one at a time, making sure to place them in the box in the exact order in which they arrived. The bees have created a brood nest in the nuc colony, and this order should be maintained.
Step 8: If external sources of pollen are unavailable, ensure you place a pollen patty on the top bars of the hive. This provides a basic supply of nutrients for the bees in their new environment. Then, feed the bees using ProSweet Liquid Feed or a 1:1 sugar mix.
Step 9: Inspect the colony four to seven days after installation. You should be able to track the brood at different stages of development. This gives a basic indication of the health and cohesion of your new bee colony. Spotting the queen is not necessary.
Post-Installation Bee Care

Feed the bees heavily until the colony is well-established, typically in the first three weeks. Use either a Pro-Sweet liquid feed or a sugar-water mix. If you opt for sugar water, adding a stimulant like ProHealth is advisable to prevent fermentation. Do not add a second deep or supers until bees have drawn 7 to 10 frames. An in-hive Pro Feeder guarantees bees access to feed irrespective of the temperature.
After 10 to 14 days, re-check the queen to make sure there are eggs and larvae in the hive. File a claim on our website within 14 days of receiving your queen if eggs or larvae are not found to comply with our queen guarantee.
| Bee Tip: Get a waterproof notebook to keep track of your hive's progress. This will be instrumental in tracking colony health and growth over time. |
Common Mistakes While Installing Package Bees

The honey bee installation process is often riddled with potential mistakes, which can prove detrimental to the hive's productivity and survival. Listed here are some common errors to provide you with helpful advice on how to avoid them.
Not Wearing the Right Gear
When installing a nuc, a beginner beekeeper may overlook the need for appropriate protective gear. This mistake can lead to unnecessary bee stings and discomfort, which might discourage further handling of bees.
To avoid this, invest in a full bee suit, gloves, and a protective veil. These gear will protect you from bee stings and help maintain a calm demeanor, a critical factor to prevent agitating the bees during installation.
Not Using a Smoker
Smoke has a unique calming effect on bees, reducing their natural defensive reactions. Without it, they can become agitated, which increases the likelihood of harmful stings.
Learning to use a smoker effectively is a simple yet key component of bee installation. This includes understanding how to light it, determining the appropriate amount of smoke, and knowing the right time during installation to employ it.
Rushing the Installation Process
One should be particularly cautious about not making hasty movements during bee installation. Swift actions can be perceived as a threat by the bees, potentially causing them to become defensive and resort to stinging.
Slowing down is the way to go. It is essential to remember that patience and calmness are key when dealing with bees. Control your actions, keep movements gradual, and give time for the bees to adjust, paving the path for a successful installation.
Improper Placement of the Hive
The placement of the hive can greatly influence a colony's survival and productivity. Setting up the hive in an unsuitable location can lead to problems such as poor honey production, disease, or even absconding.
Choosing the right location is crucial. The spot should have morning sunlight, be safe from predators, and ideally near a water source. It's also important to consider easy access for the beekeeper for regular check-ups and maintenance.
| Hive Hack: Use a compass app on your smartphone to properly orient your hive for optimum morning sunlight. This tiny measure can contribute to a healthy and productive colony. |
Not Checking on the Bees Post-installation
Even after successful installation, the work doesn't end. Many people make the mistake of ignoring the colony post-installation, which can overlook potential issues such as disease or parasite infestations.
Regular checkups and timely inspections are essential. This allows early detection of any problems, giving you a chance to intervene before serious damage can occur to the colony. Keep an eye out for signs of disease, abnormal behavior, or a decreasing population.
Ignoring Weather Conditions
Weather plays a significant role in the success of bee installation. Unfriendly conditions such as high winds, rain, or extreme heat can stress bees and make them less productive.
To avoid this, aim for a mild, calm day for installation. Picking the right day not only makes your task easier but also ensures a smoother transition for the bees, thereby improving the colony's initial success rate.
Neglecting Bee Genetics
Certain traits of bees are genetically determined, and overlooking this can be a common mistake. Characteristics like disease resistance, temperament, productivity, and adaptability to your local climate are critical.
Choosing bees that are suitable for your specific area and purpose can make managing the hive easier and more productive. Research different breeds and consult local beekeepers or extension services to choose the right breed for you.
Overcrowding the Hive

A packed hive can cause stress for the bees, potentially leading to low honey yields and increased disease transmission. Adequate space is vital for a flourishing colony.
Regularly check and manage the space within your hive. If the colony gets too large, consider methods like splitting the hive or adding additional brood boxes.
Treating Bees as a Set-and-Forget Hobby
Thinking of keeping bees as a one-time setup hobby can lead to neglected hives. Bees require ongoing care, monitoring, and maintenance to thrive.
Keep a regular check on your bees, observing for any signs of disease or abnormal behavior. Regular care and hive management are a part of successful beekeeping. The more effort you put into understanding and caring for your bees, the more rewarding the hobby becomes.
Comparing Common Bee Species for Your Hive
Choosing the right type of bee is important when keeping bees. The breed you choose can have a significant impact on honey production, disease resistance, and other aspects. To make an informed decision, below is a comparative table of three commonly used bee species:
| Bee Species | Honey Production | Temperament | Disease Resistance |
| Italian Bees | High | Gentle | Moderate |
| Russian Bees | Moderate | Somewhat aggressive | High |
| Carniolan Bees | High | Extremely gentle | High |
Embracing the Buzzing Journey Ahead
The art of beekeeping is indeed a journey of learning, patience, and attention to detail. As you step ahead to install your new bees, remember that every ounce of effort contributes toward a thriving hive. Enjoy the rewarding fruit of your hard work, and welcome to the amazing world of beekeeping!